About the Craft
This is placeholder text. To change this content, double-click on the element and click Change Content. Want to view and manage all your collections? Click on the Content Manager button in the Add panel on the left. Here, you can make changes to your content, add new fields, create dynamic pages and more.
Your collection is already set up for you with fields and content. Add your own content or import it from a CSV file. Add fields for any type of content you want to display, such as rich text, images, and videos. Be sure to click Sync after making changes in a collection, so visitors can see your newest content on your live site.
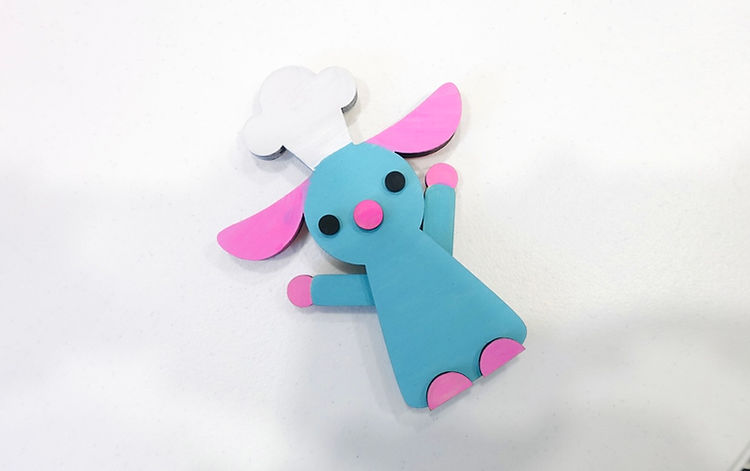
Materials
1/8" plywood
Acrylic paint
Wood glue / Elmer's glue
Craft Time!
Step 1
Use a laser cutter to cut out the separate pieces of the rat. The DXF file is provided below.
Step 2
Paint the different sections any colors you wish to use. For more accuracy, the two semi circles, bigger circle, ears, tail, and end circle of arms should be the same color (light pink).the two smaller circles are the eyes, and the other two small circles should be the color of the fur.

Paint Guide
Step 3
For assembly, take the colored circle pieces from the body cutout and glue them to the end of the arms (fur side). Once the arms dry, place the arms on top of the back of the cutout (paint side outwards) with the two holes in it with the circles on the arms fitting inside the holes. place the two non colored pieces on top of the back cut out as well, matching them up with the top and bottom of the piece and glue them down (only glue down the two non color pieces - don't glue the arms). Place the body cutout with no holes in it on top of the arms (paint side outwards), and glue it to the two non color pieces - once again not gluing the arms to either of the cutouts. Finally, glue the feet, eyes, and nose to the front of the body cutout with no holes in it.
Step 4
Finished! You now should have a poseable mini chef that you can sit on your desk or in your kitchen!